

Starting a blog is much easier than you may think. And it’s not very costly either! Once you have a blog up and running, you can monetize it in several different ways to make your initial investment back. Note: The initial investment is for one year of blogging!
Blogging is where I really started to make money online, and it’s made me the most income to date.
Affiliate links are used in this tutorial. If you sign up through these links, I will earn a commission. Thanks!
To get started, you are going to need a domain and web hosting. Hold off on the domain right now, as I have a way to get you one for free. I’ll mention it below – but first I want to talk about web hosting.
Now, you could do a free blog, but that is NOT the way to go if you want to make money. Your abilities on those sites are limited, and people have had their blogs deleted for no reason. Since you don’t own the space, you run a huge risk of all your hard work being gone without warning.
Plus, many advertisers and brands shy away from free blogs because they don’t see them as professional. And since you can get web hosting very affordably, you don’t want to give people a reason not to work with you!
How to Start a Profitable Blog with A Small Orange Web Hosting
A Small Orange is a web hosting company I highly recommend. They are super cheap for web hosting, and I have all of my blogs hosted with them.
Why choose A Small Orange?
- Super easy to get your WordPress blog up and running. I’ll show you in screenshots below how you can easily create your blog. Note: WordPress is the free platform you will use for your blog. It is simple to use and offers SO many customizations and features, you won’t be disappointed. This version of WP is different from having a free blog at WordPress.com.
- Technical support when you need it. I have been in contact with ASO when I need help and they have always responded in a timely fashion.
- You can get hosting for under $3 per month…less than a Starbucks coffee. With a price so low, it’s easy to recoup your money each month.
- You will have a self-hosted blog. No worries about your work being deleted.
DECIDE ON YOUR HOSTING PLAN
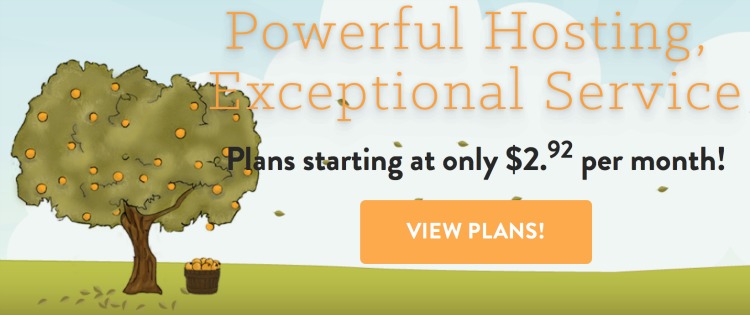
To get the ball rolling, you’ll head over to A Small Orange and decide on a plan. You could start with the Tiny plan at first, which is $2.48/month if you pay annually (and use the code below!). That is how I pay for my hosting, as it’s a one-time fee I only have to worry about once a year, and it gives me the best deal.
If you want to get a free domain name, you will need to purchase the Small or higher plan with ASO. These are still very affordable, at $5/month if paid for annually. Along with the domain name, you will get 2 months free on a small or higher plan when you pay for 12 months at once.
PLUS – you can use code AFFILIATE15 at check out to save an additional 15% off. So, let’s do the math…
Tiny Plan
$2.92/month x 12 = $35 – 15% = $29.75 + domain name (~$10) = $39.75
Small Plan
$5/month x 12 = $60 – 2 months free + free domain name = $50 – 15% = $42.50
The small plan gives you more space for images and videos, and it allows you to add unlimited domains to your web hosting account. If you decide to start a new blog or have a friend join you, you will need to have a Small plan.
REGISTER YOUR DOMAIN NAME
Once you decide on a plan, but before you finish your web hosting purchase, you will need to register a domain name. If you are going with the Small plan at A Small Orange, you will need to provide them with the name and register through them.
If you want to do the Tiny plan, you can register your domain name at NameCheap.com instead. This is where I register all of my domains, and I have never had trouble with them.
When deciding on your domain name, think of something that encompasses your blog. What do you plan to write about?
PURCHASE HOSTING
To purchase, visit A Small Orange and view the plans. Select the buy button under the plan you wish to start with.
Remember to use the code AFFILIATE15 to save 15% on your hosting! For the small plan, enter your chosen domain name and billing information. Complete the check out and you will receive the details of your new hosting plan via email!
CONNECT YOUR DOMAIN NAME TO YOUR HOSTING
If you received a free domain name through A Small Orange, you can skip this step!
For those that purchased their domain with NameCheap, you will have to sign into your account and point your new domain to the web hosting you purchased.
In your NameCheap account, click the domain name to bring up its settings. In the “Nameservers” section, you should see this…

Click “Namecheap Default” to open the drop down menu. Select “Custom”.

Two dashed lines will become available. This is where you fill in the nameservers from the email you received from A Small Orange. Type in one on each line, then click the green checkmark to the right.
It can take up to 24 hours for the domain name to connect with your web hosting, but it usually doesn’t take more than 10-15 minutes. While we wait, let’s get the domain added in your web hosting’s cPanel!
The link, username, and password for cPanel is included in the email you received from A Small Orange. Keep this information safe!
Once you log in, you’ll see lots of sections and icons. Find the “Domains” section and click the first option, “Addon Domains”.

Type in your domain name like this: yourdomainname.com and the other fields should auto-fill with text. Click the “Add Domain” button. That’s it, now we can install WordPress!
INSTALLING WORDPRESS
To install WordPress, you will need to access your cPanel.
Once you are logged in, you will see a section at the bottom of the page called “Softalicious Apps Installer”. Under “Scripts” in that section, the first option is “Wordpress”.

Click that and then click “Install” at the top of the next page!
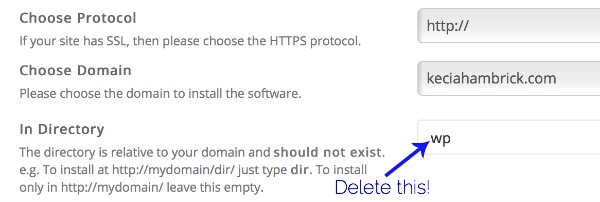
Under “Software Setups” make sure your domain name is showing in the “Choose Domain” section. Also, make sure the “In Directory” text box is blank. Sometimes it will automatically say “wp” but we don’t need that there so delete it.
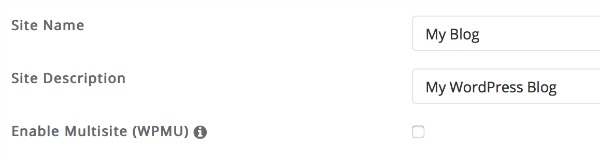
Under “Site Settings”, type in the name and description of your blog. The name of the blog is usually the domain name. For example, if your domain is bloggingtips.com, just put “Blogging Tips” for the blog name. This can be changed later.
Site description is just that, a little bit about your blog. It’s like a tagline. It can also be changed later, so just put in something for now.
Next is “Admin Account”. This is going to be your username and password you use to log into your WordPress blog. Make it difficult! Do not use “admin” as your username, as it makes your blog easier to hack.
For the username and password, use uppercase and lowercase letters, numbers, and special characters like an ! or @. Get the password strength indicator to turn green!
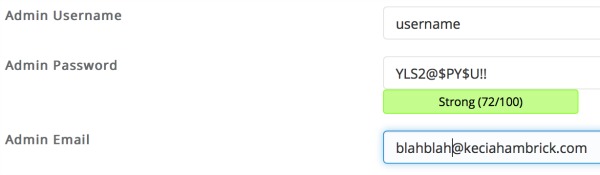
Add your email address for your blog too. A Gmail address is fine here. You can create and use a domain-based email address ([email protected]) later.
Scroll to the bottom and click “Install.” It may take 2-3 minutes to install and then you are set up! You now have a WordPress blog hosted by A Small Orange!
ACCESS YOUR BLOG
Visit yourdomainname.com/wp-login.php in order to sign into your WordPress dashboard. Use the username and password you just created in the steps above. From here, you can write your first blog post, change your blog’s theme, add plugins, and more.
Stay tuned for more customization and design tips for WordPress!
Never Miss a Post!
Get all the online income juiciness right in your inbox!